Home - Return to Previous Page
Troubleshooting Turbo Boost Issues
Boost
Pricing:
$0.00
Description
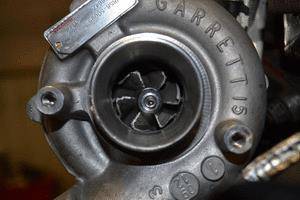
Here are several potential causes of limp mode on a TDI.
The follow procedures apply primarily to VW TDI engines with variable nozzle geometry turbos; >1998.
The turbo is a vacuum modulated device. When more vacuum is placed on the actuator, the turbo develops more boost. Less vacuum = less boost. By modulating the amount of vacuum the turbo actuator gets, the ECU is able to control boost pressure. When the ECU cannot control boost pressure, the actual boost deviates from the specified boost. When this occurs, the ECU reduces fueling and requested boost to ensure that the turbo is not damaged.
We will now cover the potential causes of this situation. Having a basic grasp of the systems that control your machine is essential if you want to keep it in top shape and/or modify it. Some of these procedures may exceed your level of mechanical competency, and should be left to an expert with a strong TDI background.
Cause #1 boost leaks.
A boost leak is a hole in the intake track between the intake manifold and the compressor outlet
of the turbo. This portion of the intake is under pressure when the engine is loaded. If there is a
hole in this part of the intake track, boost pressure will leak out, and the MAP sensor (boost
sensor) that sends a signal to the ECU reporting boost will not be able to accurately report on the
turbo's behavior. Boost leaks are typically accompanied by a hissing or whistling noise. The area
of the intake track that is leaking will typically be covered in a jet black oily film. This is oil that
seeps past the turbo's oil seals, and within reason, is completely normal.
Inspect the pressurized portion of the intake track for leaks, and remedy it as necessary. For best results, methodically
examine the system from end to end; and/or pressurize the system (5-10psi) using compressed
air an appropriate adaptor(s) and a regulator.
Cause #2 mis-adjusted VNT actuator.
The VNT actuator is the device on the turbo that has a vacuum hose attached to it. It is sort of
ball or can shaped, and has a rod sticking out of it. The computer coding is written around a
specific rod length. If the rod is the wrong length, the turbo responds differently than what the
ECU is expecting, and boost control will suffer. Actuator rod lengths are often times set incorrectly
by OE manufacturers of turbos.
Just because no one has touched it since the car was rolled off the dealer’s lot doesn't mean that it's correct.
Most turbos respond best to our programming (as well as OE programming) when the rod is of such a length that the VNT lever (the thing that the
rod is connected to opposite the actuator) begins to move from it's rest position when 3-5 inHg of vacuum is applied to it, and when the lever comes in contact with the set screw just as 18+ inHg vacuum is applied to it.
In order to test and adjust the actuator length, you will need a hand vacuum pump; available at most auto parts, department, and tool stores. A popular brand is
MightyVac. These pumps are actuated by hand and have a vacuum gauge that reads 0-30inHg. Typical cost for such a device is $15-35.
Begin by lifting the car with a quality jack and supporting it with jackstands on a solid surface. Do not use your tire changing jack. Such a jack is not safe enough to allow under car work.
These are nicknamed widowmakers for a reason. Depending on your engine compartment layout, it may be possible to adjust the actuator from the top, but it's easier to see what you're doing if you go at it from below. Remove the belly pan if equipped. Find the turbocharger. It's bolted to the cylinder head. The exhaust side (exhaust manifold) will
likely be rusty if it's been on there for a while, and the intake side (compressor housing) will be bare aluminium. Between the two housings lies the actuator and actuator rod.
Remove the vacuum line attached to the actuator. In some cases it simply pulls off the nipple, although often times it is attached with a (occasionally stubborn to remove) steel clamp. It is not necessary to replace this clamp if the vacuum line is in good condition and properly sized, since the line won't fall off. If the line is in poor condition (fraying, cracking, chafed, or otherwise) replace it and the other vacuum lines, being careful to route them in the same manner.
Attach the vacuum pump to the actuator. Apply vacuum to the actuator and determine when the rod begins to move, and when it stops. Check that it moves freely through its full range of travel. If the actuator rods hangs up, catches, or feels overly crunchy, this is an indication that the vanes are jammed with soot, or the actuator is deteriorating from rust. Adjust the actuator rod length such that it begins moving with 3-5inHg of vacuum and comes into contact with the stop just as 18inHg of vacuum is applied to the actuator.
To adjust the actuator rod length, examine the actuator rod. In most cases, there is a 10mm set nut as well as a knurled adjusting collar.
In some cases, the actuator rod is simply attached to the VNT lever by two set nuts. Loosen the set nut(s), and rotate the adjustment collar until the actuator and rod respond to vacuum as indicated above. Take precaution to prevent twisting the actuator rod by counterholding and freeing rusty components as necessary. Lengthening the actuator rod increases the amount of vacuum necessary to bring it into contact with the stop, while shortening it reduces the vacuum required. Often times boost spikes are caused by actuators that are too short. It may take a few tries to get it, and the threads of the rod may be corroded or dirty, making it difficult to turn the nut and adjuster.
Cause # 3 faulty turbo actuator.
If the turbo actuator leaks or has insufficient spring strength to bring the VNT mechanism back to its fully extended position, the actuator will require replacement. When installing it, it will be necessary to adjust the VNT actuator rod to the proper length.
Cause # 4 jammed VNT vanes.
If the car is not driven properly (it is not good to drive continuously at too low an engine speed) soot will accumulate within the vane assembly in the exhaust housing. If it cannot be freed up by cycling the VNT actuator, removal, disassembly, and cleaning of the turbo will be required. There is a how-to document by Pete Baranko (member Drivbiwire) on our site
Jammed VNT vanes will cause both underboost and overboost conditions.
Cause # 5 vacuum leaks or faulty vacuum pump.
The device (N75 solenoid) that the ECU utilizes to adjust the amount of vacuum reaching the turbo actuator relies on a constant supply of vacuum from the vacuum pump. Check to see that this device is getting sufficient vacuum by using your vacuum pump to measure the amount of vacuum on it while the engine is running. The N75 has three lines running out of it; each
connecting to a nipple/port. One leads to the turbo actuator. If the solenoid in question does not have a line leading to the turbo actuator, it is not the N75. Two of the ports on N75 are labeled, and the third is the vent port.
Check to see if the line attached to 'vac' port is pulling >25inHg vacuum. If it is not; find the vacuum leak.
Vacuum comes from the vacuum pump; located on the driver's side of the head. The big line thatcomes out of the vacuum pump leads to the brake booster. This line is 3/8" in diameter, and made of rigid plastic. Sometimes it cracks and leaks. Replace if necessary. There is a port on the rigid vacuum line to which a smaller vacuum line attaches. This line goes has a series of Ts that split this unregulated vacuum off to the various vacuum driven devices on the car.
Trace through this tree of unregulated vacuum and replace damaged lines or Ts as necessary. If all the vacuum lines and Ts have been thoroughly tested, and there still isn't sufficient vacuum at the N75 'vac' port, test the amount of vacuum being pulled at the rigid vacuum line port. If this doesn't have >25inHg vacuum, the vacuum pump is likely faulty. This part wears with the rest of the engine, so the more miles on the car, the more likely this part is to be faulty.
Cause # 6 faulty N75 valve.
If all above potential causes check out, replace the N75 valve.
Cause # 7 worn out turbo.
If above potential causes check out, the turbo may be physically worn out or damaged.
Reviews / Q&A
Reviews and Q&A
Details
- Boost
- Boost
- KermaTDI
- New


